Replacing the door seal in a refrigerator, cold room & more correctly: A step-by-step guide
Inhaltsverzeichnis
In refrigeration systems, seals play a central role. Refrigeration seals ensure that cold air remains inside the cold room, cold storage area or refrigerator and that no warm air from the outside enters. If the door seal is porous, torn or deformed, the door of the refrigerator, cold room or refrigerated cabinet may no longer close properly. This can impair cooling performance, increase energy consumption and promote the penetration of bacteria and pathogens. We will explain in this article when it is time to replace it, exactly how it works and what you should pay attention to.
Step 1: Check the old door seal
The best way to determine whether your cold room or refrigerator seal needs to be replaced is by thoroughly inspecting the existing seal. If the material is still soft, flexible and undamaged, everything is fine. Minor dirt can be removed with household remedies. For larger contaminants, we recommend using a special degreasing cleaner such as the Power Ultra RTU Spray by Frionett. However, if the material feels brittle, hard or cracked, it is time for a replacement. Refrigeration seals cannot be repaired or glued, as this would negatively affect the performance of your appliance. Refrigeration seals can, however, be easily replaced, and you can buy a new seal even for a refrigerator.
Step 2: Find the right refrigerator seal
To determine the right seal, you should first identify the seal profile. In rare cases, identification is possible using the manufacturer's rating plate . This is usually located inside or on the back of your refrigerator, cold room or refrigerated display cabinet. Using the equipment number noted on it, we can determine the right refrigerator seal for you. If no rating plate can be found, we need the seal cross-section to determine the right seal profile.
Correctly measuring the seal frame
To do this, remove the old profile seal from its holder. If the old seal is a snap-in seal, you can simply take it out. Start with the corners and carefully release the edges to remove the refrigeration seal completely. For screw-in seals , it is necessary to loosen the screw connections beforehand.
Next, you can determine the dimensions of the seal frame. Measure the length as well as the width of the frame. For snap-in seals, the so-called snap-in dimension is crucial. It refers to the dimension between the mounting points of the seal. You determine the snap-in dimension by measuring from the center of the groove to the center of the opposite groove (see figure). This dimension is important so that the mounting points of the replacement seal fit exactly into the existing groove of your refrigeration appliance.
For screw-in seals, the outside dimension or plate dimension is relevant. A plate dimension is spoken of when there is a snap plate on the door of the refrigerated cabinet in which the seal lip of the seal is inserted. We recommend taking the outside dimension while the seal is still mounted in the door or drawer. The largest outside dimension can be measured for every seal (see figure).
 While refrigerated tables, refrigerated display cabinets and refrigerator seals usually work with welded seal frames , seals are often used in cold rooms as fabric length. These are cut to fit at a 45° angle and can then be inserted into all four sides of the cold room door.
Determine the right seal profile
After you have determined the right frame size, you can in the next step identify the seal profile. To do this, cut the seal hose as straight as possible with a sharp knife or scissors. This is important so that the profile can be inserted back into the old seal frame after identification. This way you can continue to use the old frame until the new frame has been manufactured and delivered.
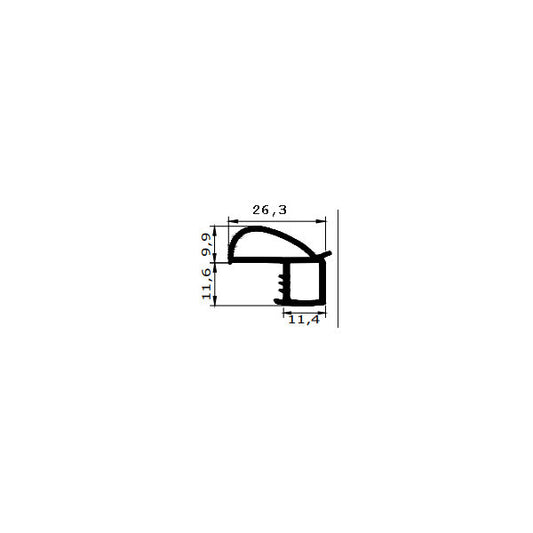
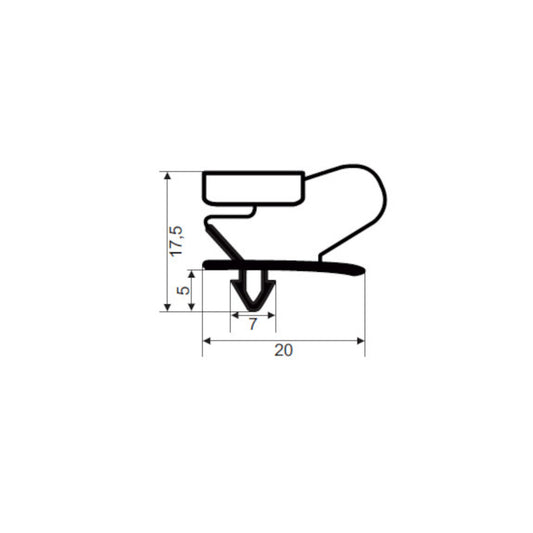
Now take a photo or a stamp impression of your seal profile and note the length as well as the width of the cross-section. You can compare these with the seal profiles on our page to determine the right profile. If your seal has a magnet, you need a magnetic profile. If you need support in determining the right profile, you can send us the photos or the stamp impression with the dimensions of the profile as well as the frame and the information about snap-in or screw-in seal via email.
In addition, the material of the seal is relevant when selecting the right profile. You can find an overview of the different types of seals in the linked guide.
Step 3: Replace the old refrigerator seal with a new one

Image: AI generated
Once the new refrigeration seal has been ordered, we need a maximum of 14 days to manufacture the seal frame, depending on the profile. Seals as fabric length are immediately available. To install it in your refrigerator, cold room or cold room door, you should first clean the groove as well as the entire sealing surface of the seal. Use a sponge or cloth with hot water and a degreasing cleaner for this. Start attaching the new seal in the corners and work your way to the center from both sides. Press the seal profile evenly to avoid air pockets and to ensure that the seal sits correctly. Screw-in seals must be screwed in for fastening. You can dispose of the old seal in the residual waste.
Step 4: Paper test to check the sealing
With a simple paper test you can check whether the new seal seals correctly. For this test, open the refrigerator door and clamp the sheet of paper between the seal and the frame when closing. Now try to carefully pull the paper towards you. If the paper can be pulled out very easily, there may be a problem with the seal, the installation, the door alignment or the clamping pressure. Alternatively, you can place a flashlight inside your refrigerator and check whether light escapes through the door seal in the refrigerator. For larger cold rooms with cold room seals, the flashlight test is not suitable.
Inhaltsverzeichnis

Defective Seal as a Cause of Contaminated Milk:...
Damaged seals as a cause of contaminated food Again and again, food is contaminated…
Defective Seal as a Cause of Contaminated Milk: How Broken Seals Affect Food Hygiene
Damaged seals as a cause of contaminated food Again and again, food is contaminated…